

Quite some time ago, I spent a lot of time making messenger bags.
The story behind the bag is actually kind of cool. My daughter (10 years old at the time, she's 17 now!), wanted a Gryffindor bag for her fifth grade year. She sketched what she wanted and I started thinking. Sometime during all that thinking, I had a dream that I had made the bag.
The dream was very real and when I woke up, I was disappointed to realized that I hadn't actually finished the bag! The cool part of the story? In the dream, I figured out how to make it, and it worked. Perfectly.
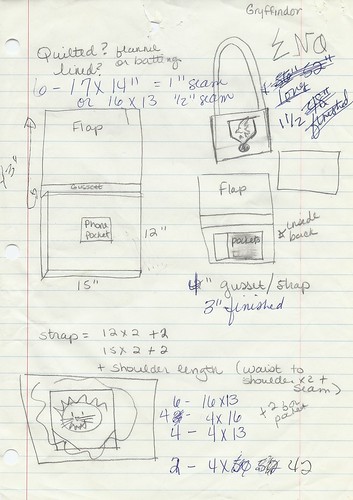
I sketched out what I'd dreamed and started figuring out the dimensions of the bag.
I almost always start with a sketch when working on a new project, but rarely does that sketch start from dreaming the process! Usually, the sketches are pretty rough (note the super-scary Gryffindor Lion above), but they do the job for what I need.
What resulted from my daughter's request was not only her messenger bag, but a slew of others (see below). It also became my most downloaded Sewhooked tutorial for quite a long time, originally written and posted back in 2006.
Messenger Bag Tutorial
by Jennifer Ofenstein

Supplies
- 1 1/2 yards of outside fabric for bag body (denim, corduroy or cotton reinforced with interfacing)
- 2 yards of lining fabric
- Approx. 1 yard or scraps of batting or fleece for quilting
- One quilt square or the fabric panel of your choice for the front center of the bag – (I typically use 10" quilt squares)
- matching/coordinating thread
- Suggested supplies - marking chalk or pencil, rotary cutter and ruler. (You can do it without these, but it will go much faster and your bag will be much more accurate with it.)
- Free block patterns available on Sewhooked and Fandom In Stitches.
- All bag seams are 1/2" unless otherwise noted.
Cut
- 2 - 16"x13" from outside fabric (inside & back)
- 3 - 16"x13" from lining fabric (flap, inside & back)
- 4 - 4”x16" pieces - 2 each from outside & lining fabric (long gussets for top & bottom)
- 4 - 4”x13" pieces - 2 each from outside & lining fabric (short gussets for sides)
- 2 - 4”x 40" pieces - 1 each from outside fabric & lining fabric (strap)
- extra lining fabric for pockets & divider - optional
- 3 - 15”x12” from scrap batting
- 2 - 3”x15” from scrap batting
- 1 – 3” x 38” from scrap batting
For the outside flap - using your quilt square or fabric panel, border the square with enough outside fabric to bring the piece to 16" x 13" This may vary depending on how big your starting piece is. You can make the square centered, as shown, or off-set.
Quilting
After all your pieces are cut and your outside flap is made, you will need to quilt the following pieces.
- Front Flap
- Inside front
- Inside back
- Bottom and Top Gusset (4x16")
STRAP
- Baste batting on wrong side of heavier fabric.
- Stitch outside fabric to lining fabric down long seams, leaving an 8-10" opening along one side seam.
- Turn right side out.
- Draw chalk quilting lines as shown in gusset photo.
- Stitch down chalk lines, top stitch down both sides of strap, carefully closing the open seam used for turning.
- If you want pockets, determine the size pockets you'd like to have, for example, big enough to hold a wallet, a cell phone, and sunglasses.
- Measure what you want to hold, cut a piece of fabric that when folded in half will be the size you want plus about 1 1/2". For example, if you want a 3x4 pocket - cut a piece approximately 4 1/2 x 9".
- Stitch together with right sides together, leaving a small space open for turning.
- The divider is VERY simple. It needs to be cut from liner fabric 16x25. Fold in half, line 16" edge up, right sides facing with one of the 16"x13" pieces.
- Baste across bottom and sides. This becomes the Bag Front Lining piece.
- If a heavier divider is needed, sandwich interfacing or scrap fabric inside before basting.
The body & lining are both stitches in exactly the same way. Please refer to photo, it will help.
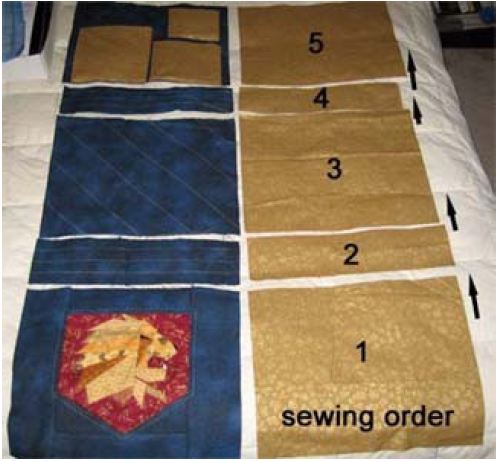
- Sew seams in this order - Front Flap to Long Gusset to Bag Back to Long Gusset to Bag Front.
- This part can be tricky! Make sure your pieces are in the right order so that when folded, each piece will be in the proper places, pockets with openings up, etc.
- If you have made a divider for the lining, you need to make sure you're catching the bottom in the seam and not the top.
- When you are done, you will have two long pieces.
- After your pieces are assembled, top stitch, making sure that your gusset pieces are pressed towards the bag pieces.
Side Gussets
Now that your body & lining are stitched, you will need to add the side gussets to each.
Pin each side gusset to the bottom gussets as shown.
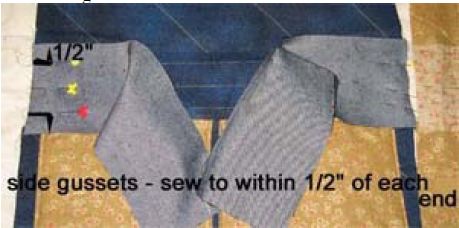
- Start 1/2" away from the edge of the fabric and stitch to within 1/2" of the other seam, marking this measurement if necessary. This is VERY important for the next step to work properly.
- After sewing each end, you will line the long side of the gusset up along the side, making sure it is smooth, The 1/2" you left open will help you do this without bunching up the fabric at the bottom. Start stitching 1/2" in from the corner, right where you left off, making sure there is no gap between the thread.
- Sew all the side gusset pieces this way.
- After the gussets are all sewn, you will have One Bag Outside and One Bag Lining.
- Turn the lining right side out. As mentioned earlier, make sure you left a partial seam open for turning.
- Pin the strap, right sides together to the long gusset on the bag. Baste with 1/4" seam.
- Place lining inside of bag - right sides facing.
- Line up all edges carefully, making sure the seams and points all meet.
- Pin well!
- Stitch all the way around, being careful not to fold in gusset seam allowances. Backstitch on corners.
- After stitching, trim corners, being careful not to clip the threads.
- Turn bag right side out.
- Press, making sure all your seams are smooth. If they are not, now is the time to fix them! It may take a couple of minutes to align everything to your liking. Once you're happy, you can close the open seam in the lining by either hand or machine stitching.
- Last, top stitch for extra strength & durability for your bag. If you have a walking foot, it's a really useful tool to use for this part while you are sewing through all the thicknesses of the bag.
- Pin well, making sure everything is smooth. Top stitch around opening and flap of bag about 1/4" away from edge. Stitch over the straps two or three times for extra strength.
- Yay, you're done! Whew! That was a lot of work... time for a butterbeer!
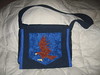
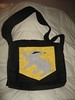
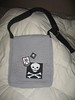
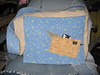
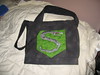
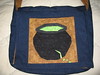
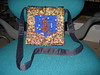
Some of my fandom-themed messenger bags made using this technique:


See all Fandom In Stitches Tutorials
Remember to share your photos with our flickr group for a chance to win one of our awesome monthly prizes!


Month 10: July 4, 2012
No comments:
Post a Comment
Hi there! If you are not logged into a Google account, your comment may show up as "anonymous user" which can make it hard for us to help! If you're looking for answers, the fastest way to get what you need is to email the designer listed on your pattern, ask in our Fandom in Stitches Facebook group, or email admin@fandominstitches.com. Happy stitching!