
You'll find a whole variety of patterns here on Fandom In Stitches, most (at the moment!) paper pieced. Many of these patterns include seam allowance and many do not.
If you're not a fan of seam allowance on your patterns, it's easy enough to trim off before you start piecing. If, however, you're like me, you may want seam allowance included when you paper piece. It's a visual reminder to not trim off too much fabric so that you'll have enough for your seams when you're ready to stitch.
I wrote the following tutorial some time ago for my own site, Sewhooked. I'm reposting it here because it's the easiest way I know to add seam allowance to a pattern!
How To Add Seam Allowance To A Paper Pieced Pattern
by Jennifer Ofenstein
You need access to a copy machine* (or scanner with copy feature), but beyond that, no special tools and only a few minutes of your time are needed.
Also included are suggestions for labeling and recording sewing order for later piecing.
*if you don't own a copy machine or scanner, you can trace the pattern with tracing paper, adding the seam allowance as you go. That will work best with simple patterns, but if you're really patient, it will work for any pattern you need to add seam allowance to.
You'll need:
- the pattern of your choice
- a copy machine or scanner with copy function
- graph paper, any grid size
- a ruler
- rotary cutter with an old blade for cutting paper (optional, but it's much easier than using scissors)
- a red or colored pen or map color
- crayons, markers, etc. (optional)
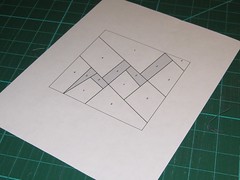
Print the pattern of your choice.
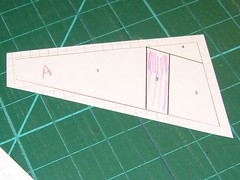
Using your ruler, draw over the lines where the pattern pieces separate (the seam lines), making sure you go past the outside edges of the pattern. Red is used here because it's easy to see.
If the pattern does not have a line indicating where the outside edge is, I recommend adding one with your ruler.
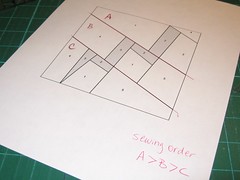
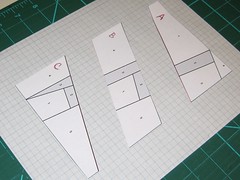
If the individual pieces aren't labeled and you think you might need it later, label them now. This is especially useful in more complicated patterns. I like to use letters (A, B, C), but you can mark them any way you like. If you need to, make a notation of how the pieces will go back together, for example: A>B>C.
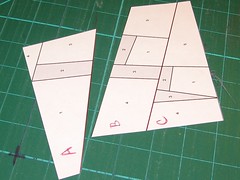
Use the rotary cutter to neatly trim the pattern to the seam lines, cutting through those that go across the pattern. You can use scissors here, but you need to be extremely precise.
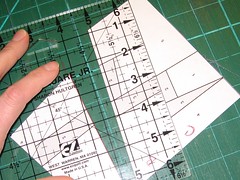
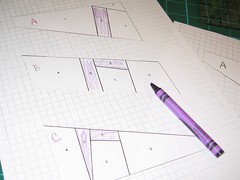
Place the pattern pieces face up on a piece of graph paper, using a dot of glue or piece of tape to hold them in place.
Any size grid will do. The grid will make the seam allowance distinctive without using up too much ink.
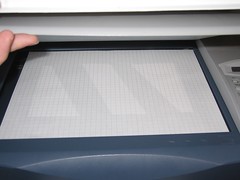
Place the grid paper face down on your copy machine or scanner and make a copy.
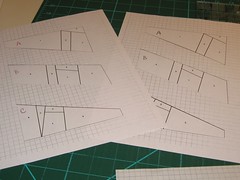
A colored copy (L) and a black & white copy (R). Either works fine.
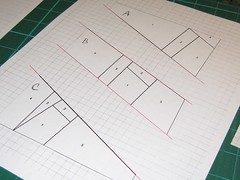
Using your ruler and red pen or map pencil, draw lines along the inside seams. This will give you a reference point for lining up your pieces later. See: Paper Piecing: Step By Step for additional instructions.
If you'd like the pieces of your pattern colored for easy reference while you're piecing, now is a great time for that. Grab a crayon and color away, marking as little or much of the pattern as you wish! This is a great trick to use if you're piecing with more than two colors so you don't accidentally mis-piece any fabrics.

Using your rotary cutter and dull or paper-designated blade, trim the pattern pieces leaving a 1/4" seam allowance. It's easy to see the grid left from photocopying.
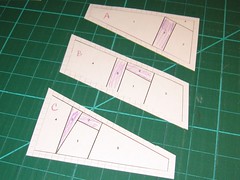
Repeat on all pattern pieces and you're done! The pattern has seam allowance and you're ready to piece.

No comments:
Post a Comment
Hi there! If you are not logged into a Google account, your comment may show up as "anonymous user" which can make it hard for us to help! If you're looking for answers, the fastest way to get what you need is to email the designer listed on your pattern, ask in our Fandom in Stitches Facebook group, or email admin@fandominstitches.com. Happy stitching!