
Out of respect for new Whovians, we are inserting a spoiler break.
Keep scrolling for the awesomesauce project...
..
..
..
..
..
..
..
..
..
..
..
..
Today, we depart slightly from our usual quilt patterns with a glorious Doctor Who-themed tutorial shared by Aalia from Joy of Stitches!
Want more fun projects? Check out our Tutorial page!
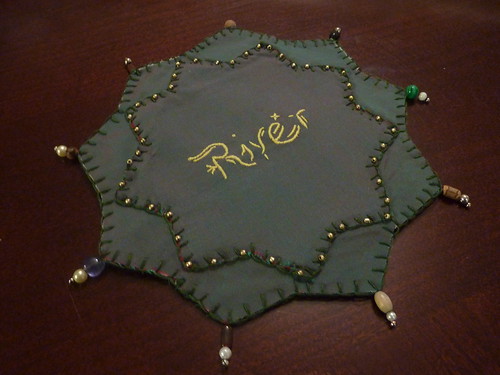
River Song Prayer Leaf Tutorial
an embroidery project by Aalia Zaman
posted with permission
You will need:
(2) 8" squares of dark green silk dupioni (or similar)
(2) 10" squares of dark green silk dupioni (or similar)
(2) 8" squares of double-sided fusible interfacing or webbing
(1) 10" square of double-sided fusible interfacing or webbing
embroidery floss: one skein each of dark green and gold
beading thread
gold seed beads
assorted small beads in gold, green, natural, and pearl
10" embroidery hoop
embroidery and beading needles
star templates and embroidery pattern, printable here (printing on tracing paper is recommended)
This is constructed as a multi-layer sandwich, with the double-sided interfacing acting to baste the layers as you hand-stitch them together.
1. Fuse the small (8") squares of interfacing/webbing to the wrong sides of the small (8") dupioni squares. Pin the small star pattern to the centre of these squares and cut out along the star edges.
2. Fuse the large (10") square of interfacing/webbing to the large (10") square of dupioni.
3. Remove the paper backing from the interfacing/webbing from the star shapes and fuse to the centre of the large (10") squares.
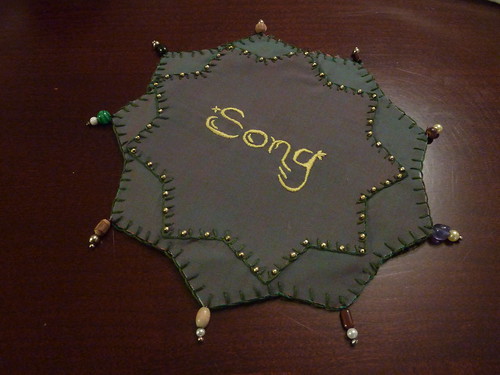
4. Transfer the 'River' and 'Song' designs; one to each of the stars. (Since this is opaque fabric, use dressmaker's carbon to transfer or freehand the design.)
5. Using 2 strands of gold floss, stitch the designs as you prefer on the hoop. The photos show a backstitch with satin stitch overlay. This is time consuming: a quicker stem stitch or chain stitch would work well, too.
8. Remove the pieces from the hoop and press stars carefully - avoiding the beads! Line up the two stars by matching the star points using pins inserted straight through the 2 layers. Fuse the two sides together.
9. Using the large star pattern, align the smaller stars so that the points alternate with the large star points. Pin and cut, adjusting as needed so that you do not cut through your blanket stitching. Frequently flip up the edge to make sure you're not cutting through your stitching!
10. Using 3 strands of green floss, work a blanket stitch around the outer edge of the large star, covering the raw edges. This is done off the hoop, so it helps to work on a flat surface.
11. Using beading thread, add baubles to each large star point. The photos show a natural round or oval bead, a smaller pearl or metallic bead, and a large metallic seed bead on each point. Hide the knots in your thread by prying apart the edges of the fabric and starting your thread from the inside out.


This is awesome! Aalia did a fantastic job with that :D
ReplyDelete(Bah. Why the captcha? I think they're out to get me. I can never tell what they're asking me to type in.)
WOW!! Aalia's work is always so beautiful!
ReplyDelete