

by Shannon Shaw
reposted with permission
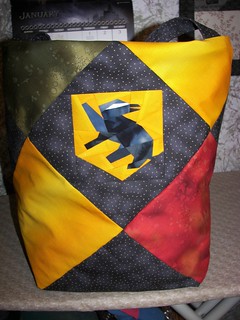
Gryffindor Tote Bag Directions
It is with great excitement that I share the following awesome tutorial written by Shannon Shaw. Shannon has been a friend of Fandom In Stitches from the beginning. She is the long-arm quilter for the original Project of Doom quilt. In addition to being a fantastically talented piecer and long-arm quilter, Shannon also makes beautiful hand-dyed yarn.
Find her on Rock Creek Quilts and in her Etsy Shop.
Be sure to scroll all the way to the bottom for the Hogwarts House Unity Tote!
Be sure to scroll all the way to the bottom for the Hogwarts House Unity Tote!
Printable Directions
Bag
Fabric A (Gold)
- 7 - 8" x 8"
- 2 - 6" x 6" (cut in half diagonally to make 4 triangles)
Fabric B (Scarlet)
- 4 - 8" x 8"
- 2 - 9" x 9" (cut in half diagonally to make 4 triangles)
Straps
Fabric B (Scarlet)
- 2 - 4" x 25"
Lining
Fabric B (Scarlet)
- 1 - 22 1/2" x 44"
Cotton Batting or Fusible Fleece
- 2 - 1 1/4" x 25"
Alternate fabrics for the Hogwarts House of your Choice
| Slytherin | Ravenclaw | Hufflepuff | |
| Fabric A | Silver/Gray | Bronze/Brown | Black |
| Fabric B | Green | Blue | Yellow |
| Straps | Green | Blue | Yellow |
| Lining | Green | Blue | Yellow |

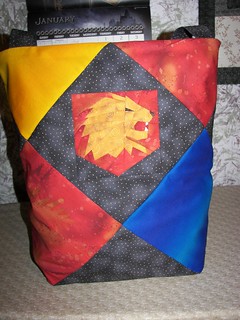
Piece your favorite Harry Potter block. It doesn't have to be a Hogwart's house block.
Harry Potter Pattern Page
Harry Potter Pattern Page
Trim edges even with edges of HP block
Square block to 8 " x 8"
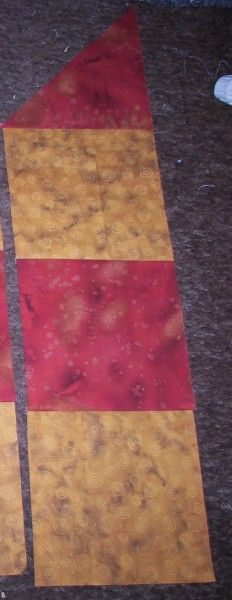
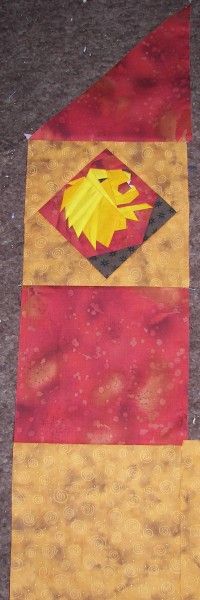
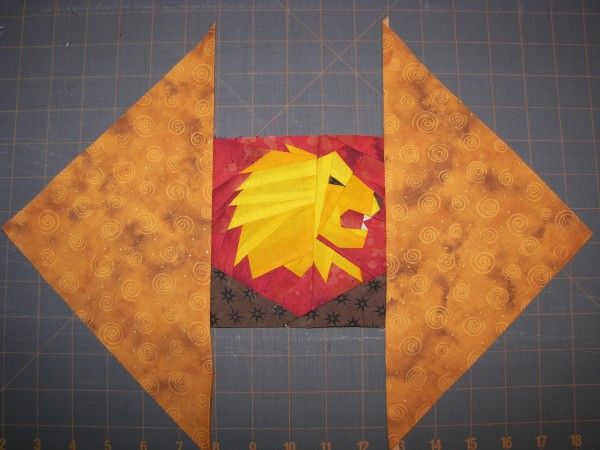
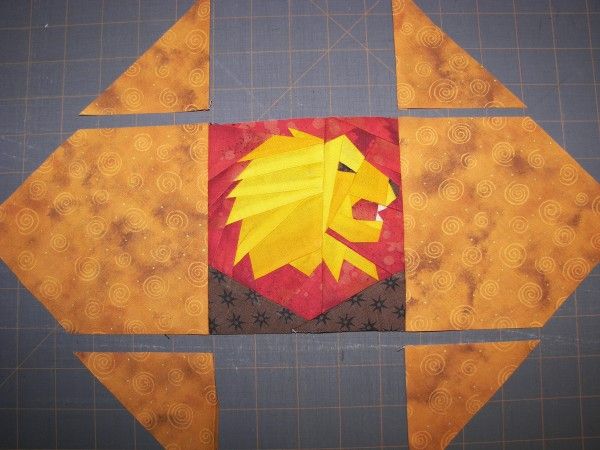
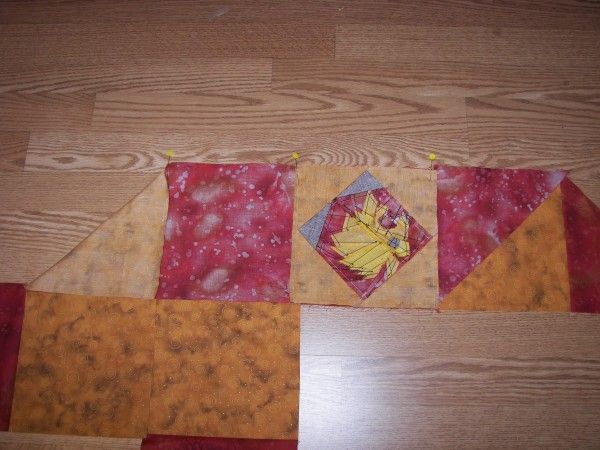
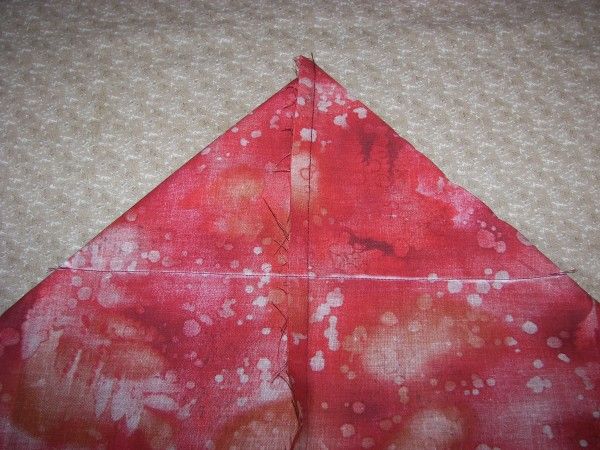
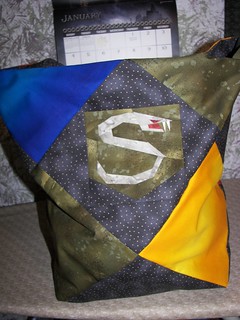
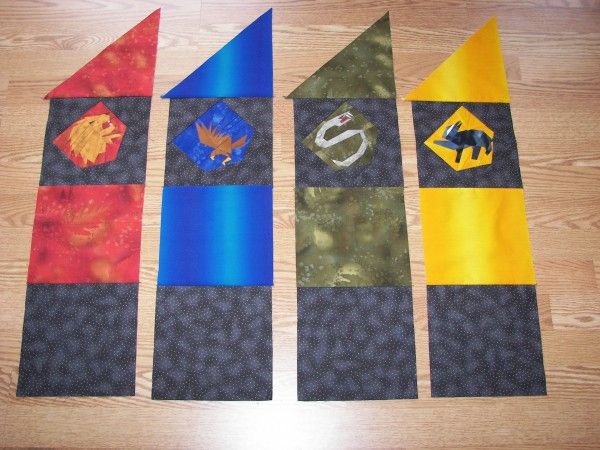
Referring to the first picture (L), sew a gold 8" x 8" square to a scarlet 8" x 8" square to a gold 8" x 8" square to a scarlet 9" triangle. Make sure the scarlet triangle is positioned correctly. Press towards scarlet fabric. Repeat to make 3. Make another one with the HP block positioned as in the second photo (R).
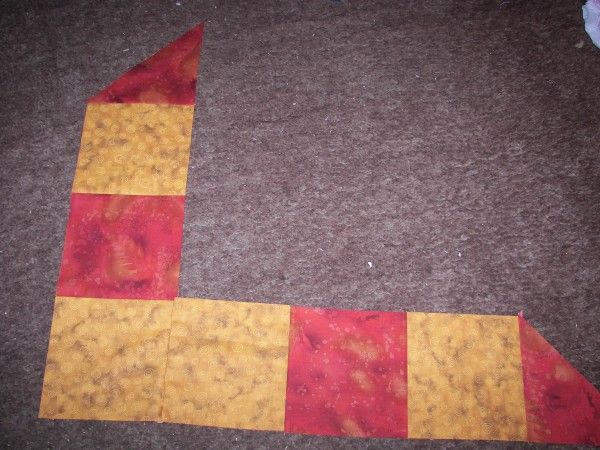
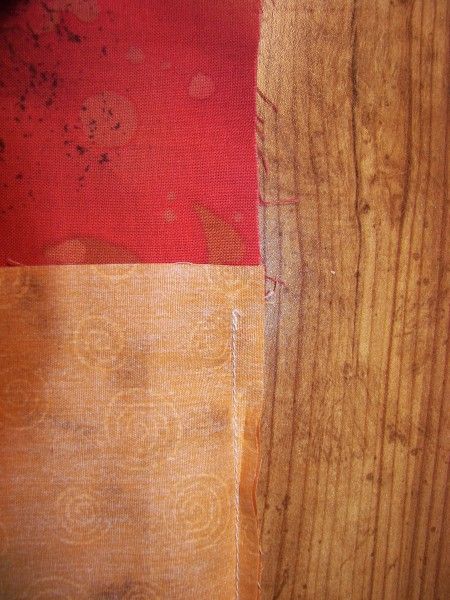
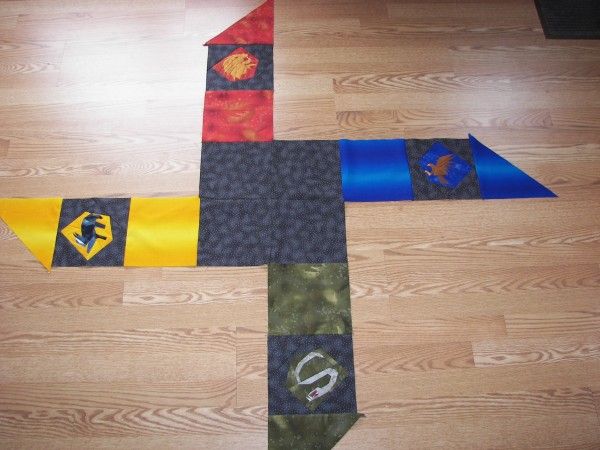
Looking at picture, sew the bottom of a gold square to the side of the other gold square to make an L shape. Start the seam 1/4" in. Repeat to make 2 total.

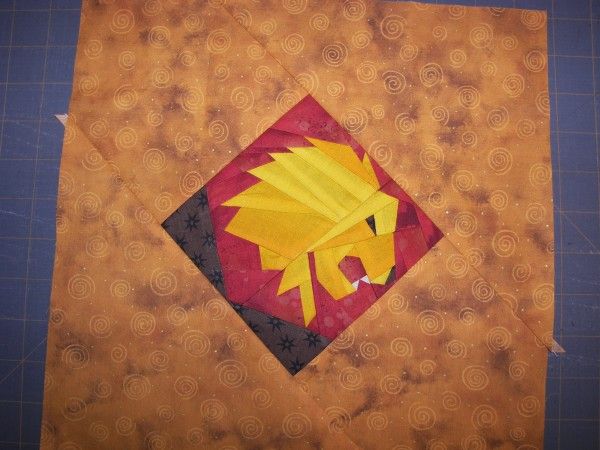
Looking at pic & diagram, sew both L shapes together leaving 1/4" open on each sides of seam
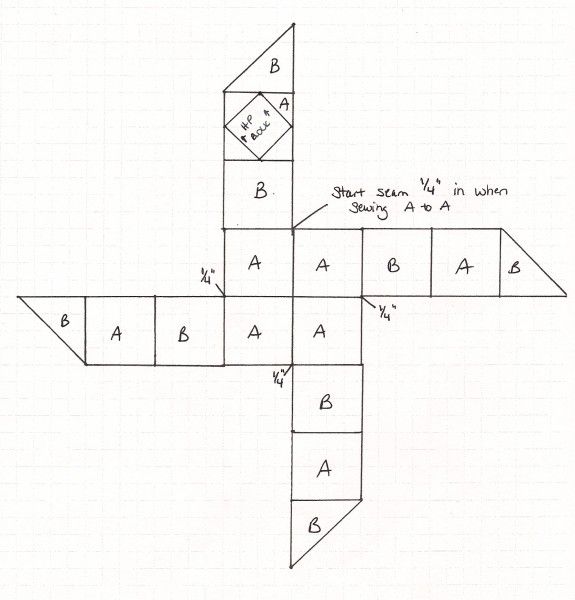
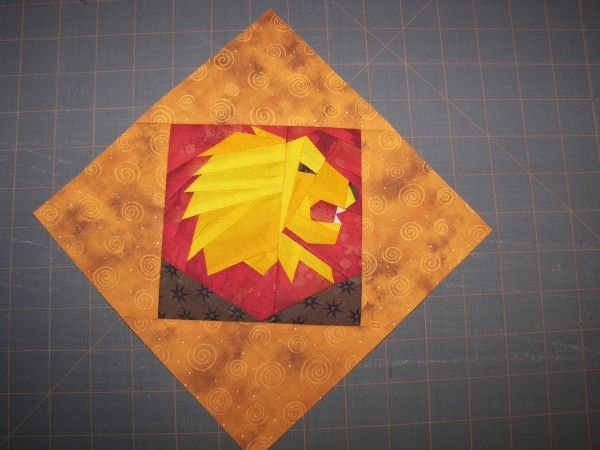
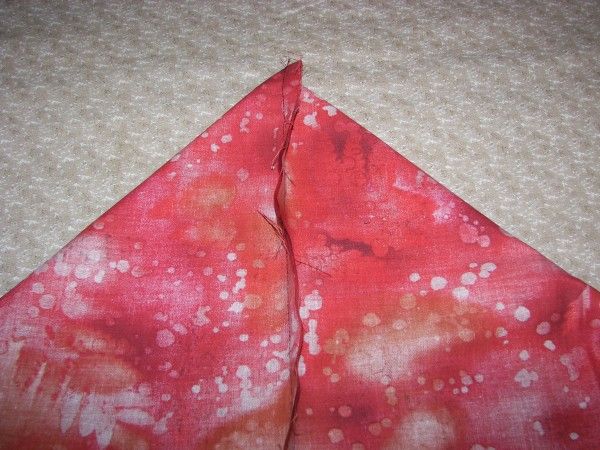
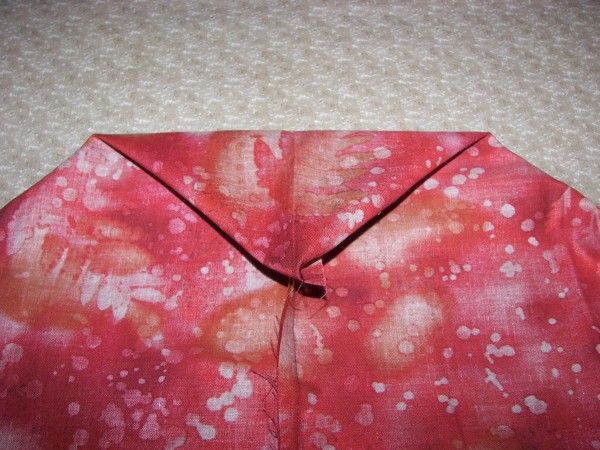
Now take one scarlet point and pull it over the corner of where the gold square is sewn to the scarlet triangle. This will sew one side of the bag together.
Repeat for remaining 3 sides and turn right side out.
STRAPS
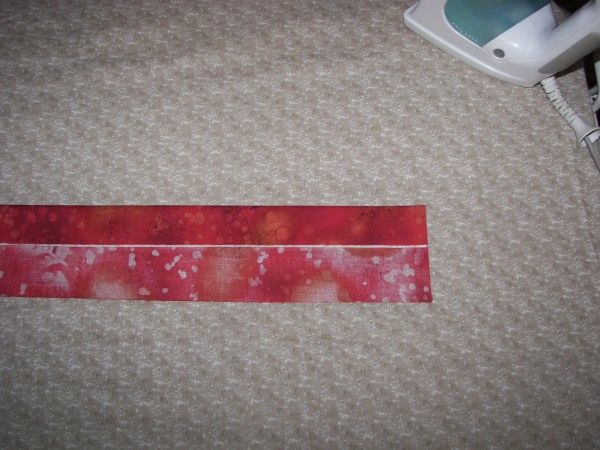
Lay each 4" x 25" piece of strap fabric right side down on ironing board. Place a 1 1/4" x 25" batting/fleece even with one edge of strap and fold over. Press.
Fold opposite raw edge over to meet other folded raw edge. Press.
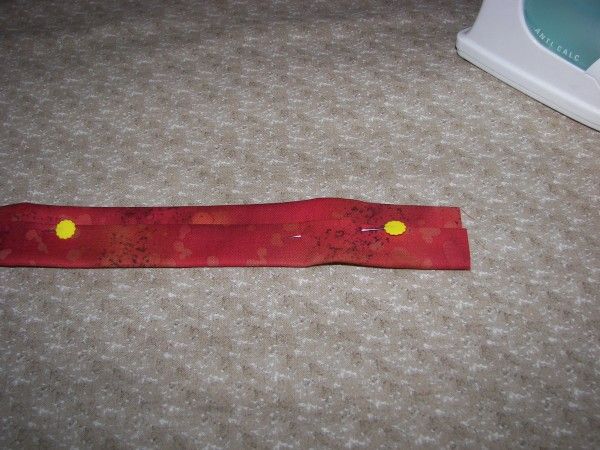
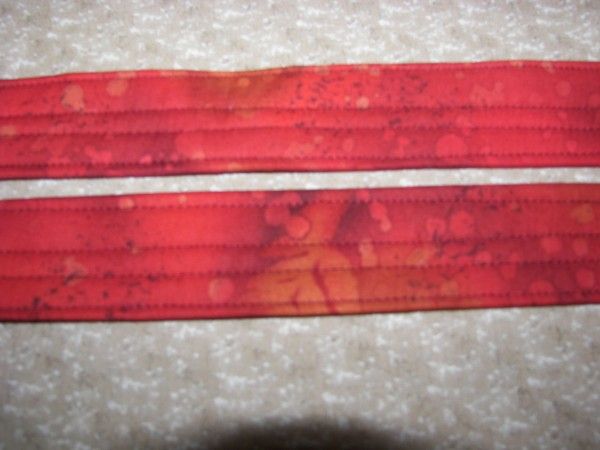
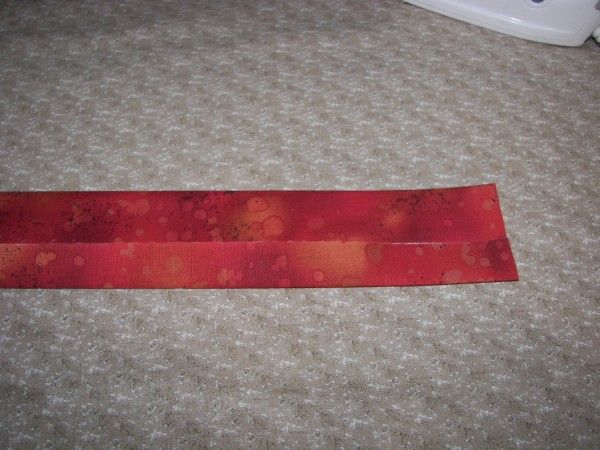
Fold over to completely encase batting/fleece. Press, pin and stitch to secure edge. Add a stitch or two on each side of first seam. You can use decorative stitches if you would like and your sewing machine has them.

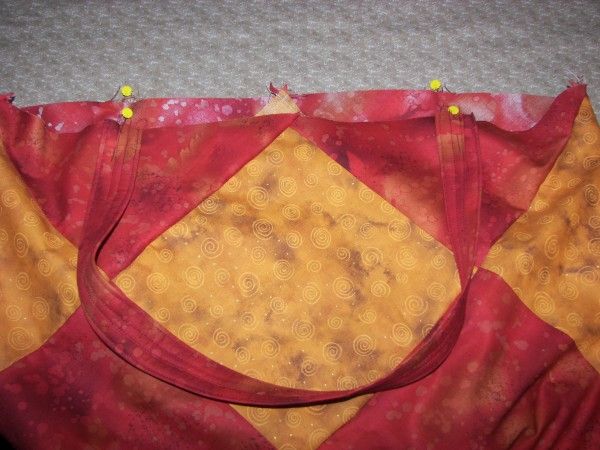
Pin each strap end to the center of each scarlet triangle. Baste all 4 ends.
LINING
W/right sides together and using a 1/2" seam, stitch down one side. On the opposite side, sew a seam leaving an 8" opening in middle of side. Press bottom folded edge.
W/bag still wrong side out, line up side seam with pressed bottom edge of lining. Press.
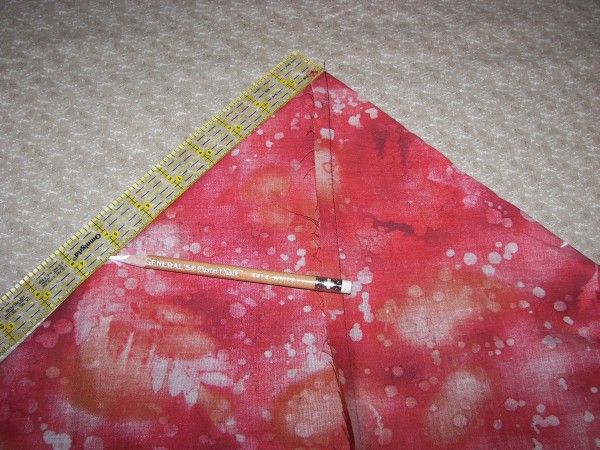
Measure down from point on each side 7 3/8". Mark on each side and draw a line connecting each mark. Pin & sew a seam on drawn line.

Repeat for other side and trim off corners.
Attaching Bag to Lining
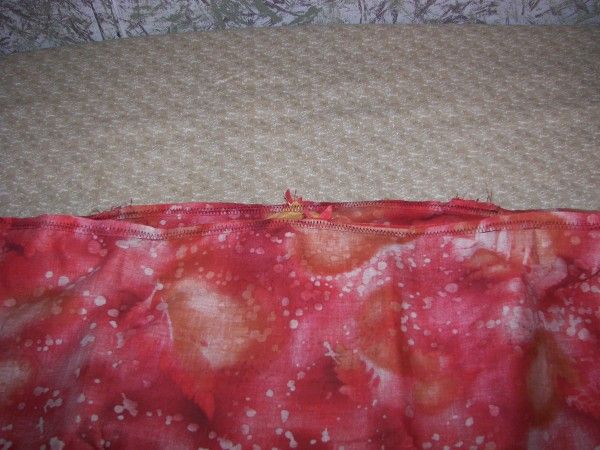
W/ bag right side out and lining inside out, place bag inside lining. Pin top edges and stitch together. (I added a zigzag stitch to reinforce the seam.)
Pull bag right side out through the opening in the side of the lining. Whipstitch opening shut. Place lining inside bag & iron top of bag.
Enjoy your Hogwarty goodness!
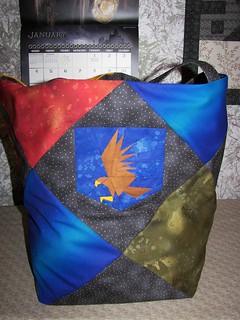
Hogwarts House Unity Tote Directions
Bag
Fabric A (Black)
- 4 - 8" x 8"
- 8 - 6" x 6" (cut in half diagonally to make 16 total)
- 1 - 8" x 8" of each of the 4 colors
- 1 - 9" x 9" of each of the 4 colors (cut in half diagonally using 1 triangle of each color)
Fabric A (Black)
- 2 - 4" x 25"
Fabric A (Black)
- 1 - 22 1/2" x 44"
Printable Directions
Written and photographed by Shannon Shaw. Updated for Fandom In Stitches by Jennifer Ofenstein.
Signature Block Pattern | Reminder! The four TABABOM designers, Jennifer, Michelle, Lilja and Schenley, would be honored if you would consider sharing a signature block with each of us to help us commemorate your participation in There and Back Again.
In return for your signature blocks, the TABABOM Designers will donate $1 for each block received (per designer) to the Red Cross in our respective countries.
See the original blog post for more details. |

Remember to share your photos with our flickr group for a chance to win one of our awesome monthly prizes!


Month 12: September 5, 2012
No comments:
Post a Comment
Hi there! If you are not logged into a Google account, your comment may show up as "anonymous user" which can make it hard for us to help! If you're looking for answers, the fastest way to get what you need is to email the designer listed on your pattern, ask in our Fandom in Stitches Facebook group, or email admin@fandominstitches.com. Happy stitching!